Article: How to Set Up a Monitor Light Bar for Better Eye Comfort
How to Set Up a Monitor Light Bar for Better Eye Comfort
Updated August 2026
Comfortable screen time does not begin with making your desk as bright as possible. It begins with putting the right amount of light in the right place.
A monitor light bar adds focused light to the keyboard, documents, and work surface without taking up desk space. When it is selected and positioned correctly, it can reduce distracting reflections and soften the contrast between a bright screen and a dark desk. This guide explains how to create that setup across standard monitors, curved displays, All-in-One PCs, and more complex workstations.
What Makes Monitor Lighting Comfortable?
“Eye-care” is not a single feature. It is the result of several parts of the lighting system working together.
1. A controlled beam
A well-designed monitor light bar directs light down toward the desk instead of forward into your eyes or back onto the screen. Quntis monitor lights use an asymmetrical optical design to separate useful task lighting from the display area. After installation, you should still check the result from your normal seated position because screen angle, surface finish, and mounting height all affect reflections.
2. Appropriate brightness
The brightest setting is not automatically the most comfortable one. Your desk should be clearly visible without looking dramatically brighter than the rest of the room. Start low, then increase the output until you can see the work surface without squinting or leaning forward.
3. Stable, flicker-free light
Visible or unstable flicker can be distracting during long sessions. Light quality also depends on the power source, so use a USB port or adapter that meets the requirements of your specific light bar.
4. Adjustable color temperature
Color temperature changes how the workspace feels. A neutral or cooler light can suit detailed daytime work, while a warmer setting often feels gentler in the evening. There is no universal setting that is right for every person or every room; the useful feature is the ability to adjust it.
5. Natural-looking color
A high color rendering index helps paper, objects, artwork, and materials appear more natural under the lamp. This is especially useful for illustration, product work, crafts, and other tasks where the appearance of color matters. It does not replace proper display calibration for color-critical digital work.
Check Your Screen Before Choosing a Light Bar
The monitor shape and mounting area matter as much as the lighting specifications. Before installation, check the following:
- Screen type: Is the display flat, curved, ultra-wide, or part of a multi-monitor setup?
- Top-edge thickness: Is it within the mounting range stated for the light bar?
- Rear profile: Is there a stable surface for the counterweight or rear support?
- Webcam and sensors: Will the mount cover a built-in camera, microphone, light sensor, or facial-recognition hardware?
- Controls: Will touch controls remain easy to reach, or would a remote-control model be more practical?
If you are comparing current Quntis models, use the Quntis Monitor Light Bar Comparison to check screen size, monitor type, mounting design, control method, light output, and other model-specific details.
Can You Use a Monitor Light Bar on an All-in-One PC?
Yes, in many cases a monitor light bar can be used with an All-in-One PC. Compatibility depends on the shape of the display housing.
Before mounting a light bar, confirm that:
- The top edge fits within the light bar's supported thickness range.
- The rear housing gives the mount or counterweight a stable contact point.
- The light bar does not cover the built-in webcam, microphones, sensors, or ventilation openings.
- The screen and stand remain stable after the light bar is installed.
- The available USB port can provide the power required by the light bar.
All-in-One designs vary widely. Some have a slim, monitor-like profile, while others have a thicker or curved rear housing because the computer components are built into the display. If you are unsure, check the exact computer model and compare its top and rear profile with the mounting specifications of the light bar.
How to Install and Adjust a Monitor Light Bar
Step 1: Set your screen position first
Adjust the monitor to your normal viewing height and angle before adding the light. The lamp should adapt to your ergonomic screen position, not determine it.
Step 2: Mount the light securely
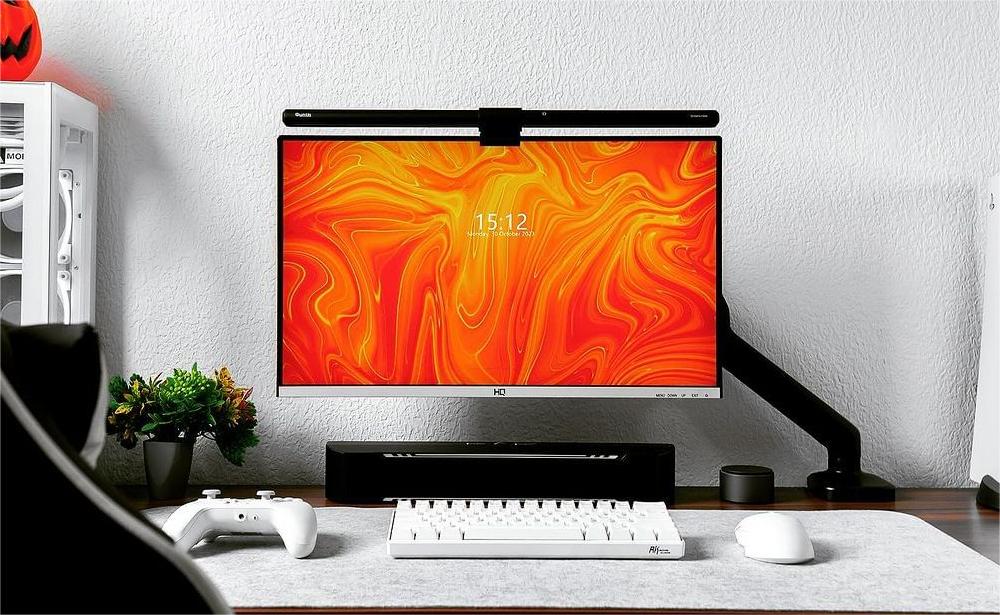
Place the mount at the top of the display, usually near the center. Make sure the front contact and rear support sit firmly without covering vents, cameras, or sensors. Do not use excessive force or add pressure to a thin screen panel.
Step 3: Connect a suitable power source
Use the supplied cable and a USB source that meets the product's stated requirements. If the light flickers, switches off unexpectedly, or cannot reach normal brightness, test it with another suitable power source before assuming the lamp is faulty.
Step 4: Aim the beam at the work surface
Rotate the light until it illuminates the keyboard and desk while staying out of your direct line of sight. Open a dark image on the screen and check for reflections, which are often easier to see against a dark background.
Step 5: Start with low brightness
Increase brightness gradually until documents and desk objects are easy to see. If the room is dark, a lower setting will usually create a more balanced result than maximum output.
Step 6: Adjust the color temperature
Match the setting to the room and the task rather than following a fixed rule. Neutral or cooler light can work well during the day; warmer light can create a softer transition into evening use.
How to Use a Monitor Light Bar Throughout the Day
Daytime work and study
Use the light bar to fill shadows on the desk rather than compete with daylight. If the room brightness changes during the day, adjust the lamp manually or use auto-dimming when the model provides it.
Evening screen time
Lower the front light and choose a warmer setting if that feels more comfortable. Avoid using a bright screen and task light in an otherwise completely dark room. A soft background or ambient light can reduce the visual contrast between the display and the surrounding space.
Reading and handwriting
Aim the beam far enough forward to cover the page, not only the keyboard. If your writing hand creates a strong shadow, adjust the light angle or add a secondary task light from the opposite side.
Design and creative work
Use a consistent brightness and a neutral color temperature when evaluating physical colors. Keep in mind that ambient light, screen calibration, and surrounding wall colors can all influence color perception.
Gaming and entertainment
Reduce the front light if a bright desk distracts from the screen. A soft backlight can add depth and make the transition between the display and the dark room feel less abrupt without reflecting on the screen.
A Better Desk Uses Layers of Light
Quntis approaches desk lighting as more than a single lamp. The workspace has a surface, a vertical area, and surrounding depth. These can be addressed in three practical layers:
- Core light: A monitor light bar or eye-care desk lamp illuminates the keyboard and immediate work surface.
- Work-area light: A wider task lamp fills larger desks, documents, creative tools, or multi-monitor areas that the core light does not fully reach.
- Ambient light: A soft backlight or surrounding glow reduces the sense of working in a bright rectangle inside a dark room and adds visual depth to the setup.
Not every desk needs all three layers. Start with the core light, observe where shadows or strong contrast remain, and add only the lighting that solves a real problem. This is the idea behind Quntis “For the Hours That Add Up”: professional light should support the way a desk is actually used, from focused work to relaxed evenings.
For more detail, read Layered Desk Lighting for Eye Comfort: From Flat Light to Depth.
Frequently Asked Questions
Is a monitor light bar suitable for a PC All-in-One?
Often, yes. Check the top-edge thickness, rear housing, stability, webcam and sensor position, ventilation, and USB power before installation. Compatibility depends on the exact All-in-One design and the light bar's mounting range.
Can I use a monitor light bar with a curved screen?
Yes, if the light bar and mount are specifically compatible with the screen's curvature and rear profile. Check the product specifications rather than assuming a flat-screen mount will fit.
Can I keep my webcam on top of the monitor?
That depends on the light bar and webcam mounts. Choose a camera-friendly design or use a compatible camera base so both accessories remain secure and the camera view is unobstructed.
Which color temperature is best?
There is no single best setting. Neutral or cooler light often suits daytime focus, while warmer light may feel more comfortable in the evening. Adjust it to the room, task, and your preference.
Should the lamp always use maximum brightness?
No. Use only the brightness needed to see the desk comfortably. Excessive brightness can create glare on glossy objects and make the workspace feel unbalanced.
Build the Lighting Around Your Desk
A good monitor light bar should feel quiet in use: the desk is visible, the screen remains clear, and adjustments do not interrupt the task. Choose a model that fits the screen securely, aim it at the work surface, and tune the brightness to the room. From there, add wider task or ambient lighting only when the desk genuinely needs it.
Explore the Quntis Monitor Light Bar collection, or leave a comment with your monitor or All-in-One PC model if you need help checking a particular setup.
-
X (Twitter): https://x.com/QuntisO
-
Instagram: https://www.instagram.com/quntisofficial/
-
YouTube: https://www.youtube.com/@Quntis
-
Reddit: https://www.reddit.com/r/Quntis/
-
Find Your Light for your setup here